
Organizing model content using Modelviews
The model content may be organized in several modelviews. The reason for doing so may vary. One reason may be to have views of different levels of detail, such as showing high level concepts in one modelview, and detailed views of the different concepts in separate modelviews. An example of this would be to focus on object and relationship types in one modelview and types with their properties in a second modelview.
In another situation, if you have a large model covering separate areas such as business or technical, it would be natural to use different modelviews for the separate areas.
What to remember is, if the same object appears in two or more modelviews, you should do a “Copy” in the first modelview and do a “Paste View” in the second modelview. The same applies if you want the same object-relationship structure to appear in different modelviews. Do a “Copy” in the first modelview followed by a “Paste View” in the second.
Create modelview
You create a modelview by choosing “New Modelview” in the popup menu on the background. And you can do “Edit Modelview” if you want to change the name or the description.
If you have several modelviews they will be sorted by their names. If you want a specific sequence, you may let the first part of the name be a number. In that way you can control the sequence.
Layout customization
In each modelview you can specify:
-	automatic layout
-	routing and curve
-	show cardinality on/off
There are a few built-in layout algorithms that you can choose to use if you want:
-	“Circular” layout
-	“Grid” layout
-	“Tree” layout
-	“ForceDirected” layout
-	“LayeredDigraph” layout
The default is “Manual” layout. It is recommended that you test the different layout algorithms to see if any suits your need.
You can also define different kinds of “Routing”. The alternatives are:
-	"Normal"
-	"Orthogonal"
-	"Avoids Nodes"
“Normal” means straight lines, as shown in most examples in this document.
In addition to routing, you can define something called “Curve”, with allowed values:
-	"None"
-	"Bezier"
-	"Jump Over"
-	"Jump Gap"
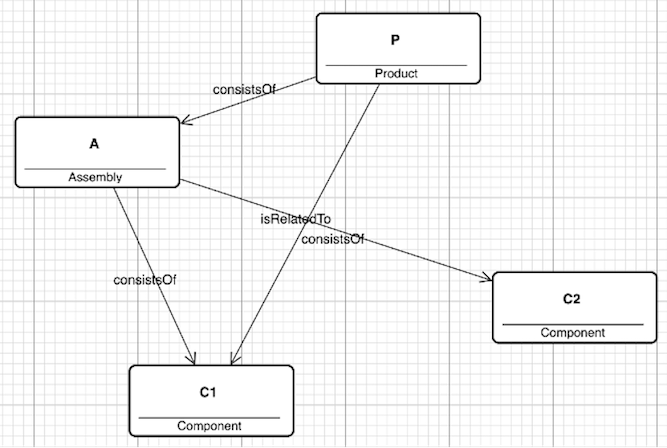
Below you can see how a diagram changes appearance with different combination of the above, and we start with the defaults:
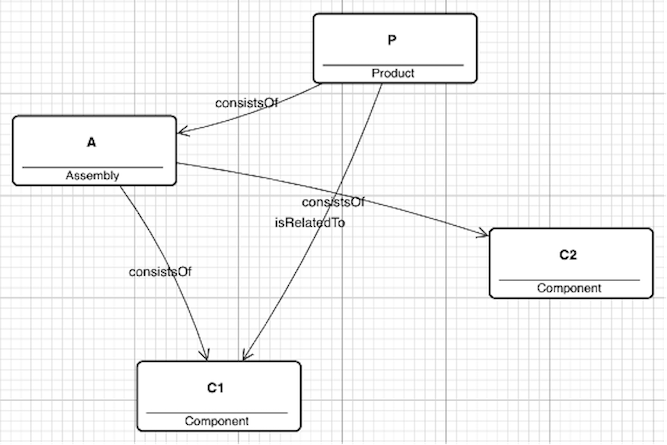
Then with “Curve” set to “Bezier”:
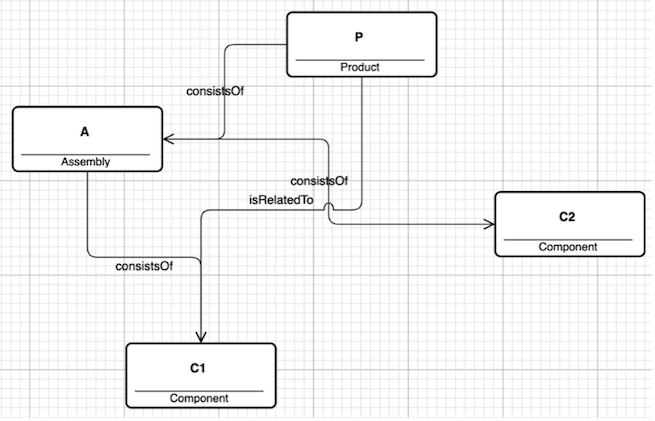
The next example has the following parameters: - “Routing” has been set to “Orthogonal” - “Curve” has been set to “Jump Over”
Note the two relationships that cross each other, how they are drawn in the diagram.
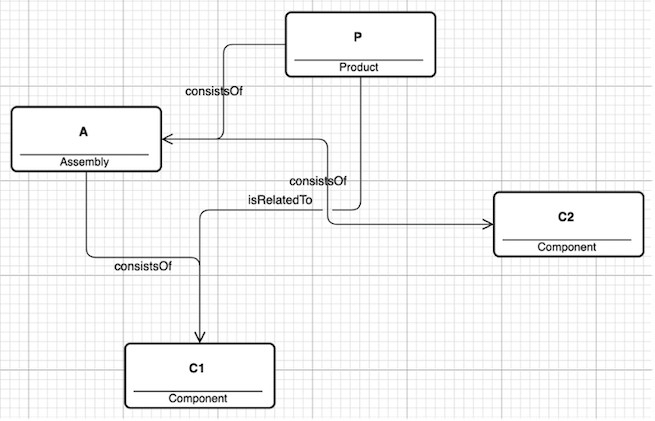
The same as above, except that “Curve” has been set “Jump Gap”. Note the difference.
The last thing to mention regarding modelviews is the ability to turn the visibility of cardinality on and off. You do this from the background menu:
- Toggle Cardinality On/Off
Below is an example of a product metamodel that you will meet later in this document. The “Toggle Cardinality” has been set to “On”: