Define the WellAcquisition OSDU Types
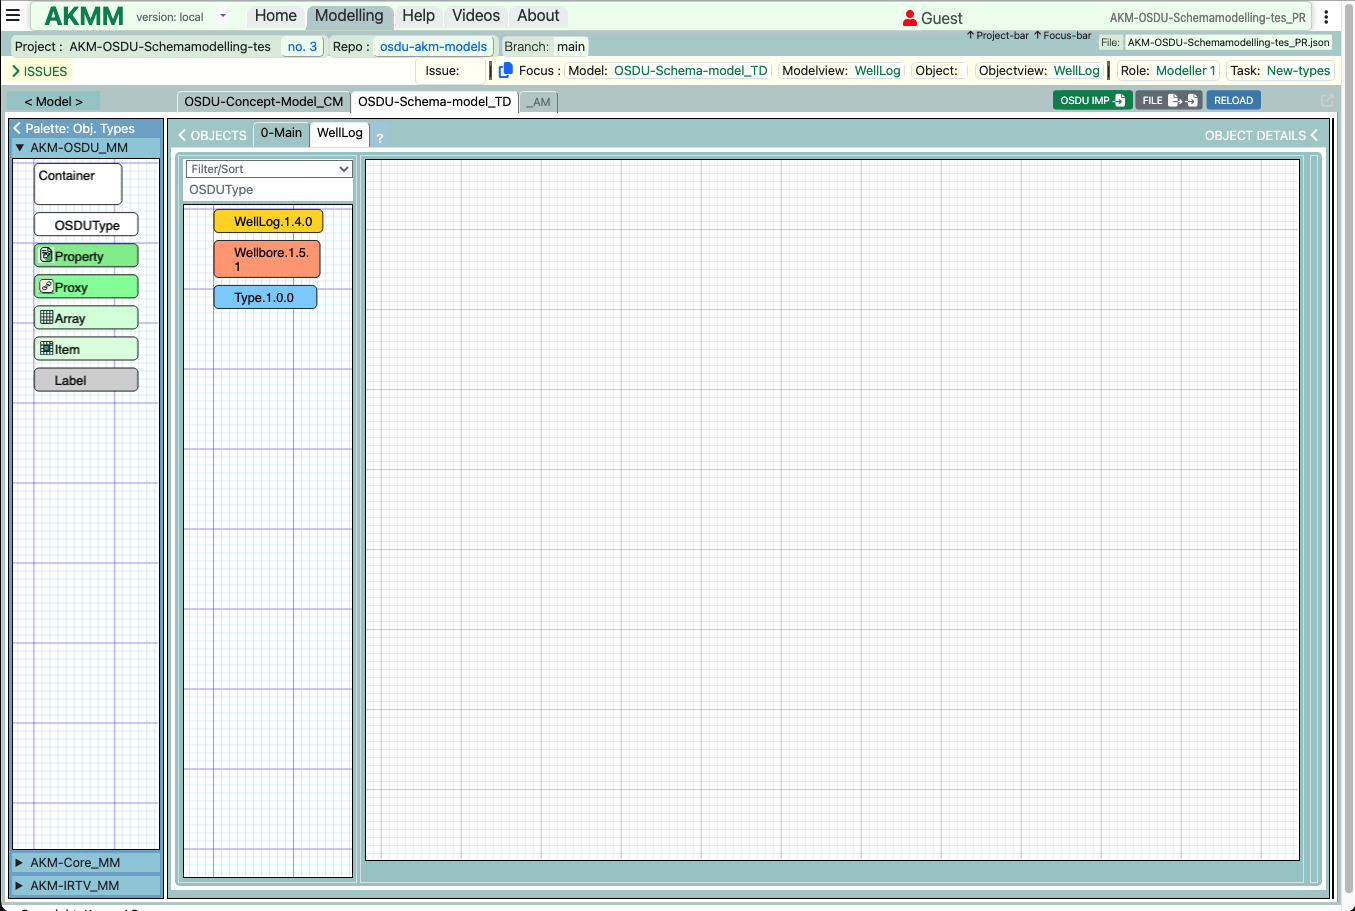
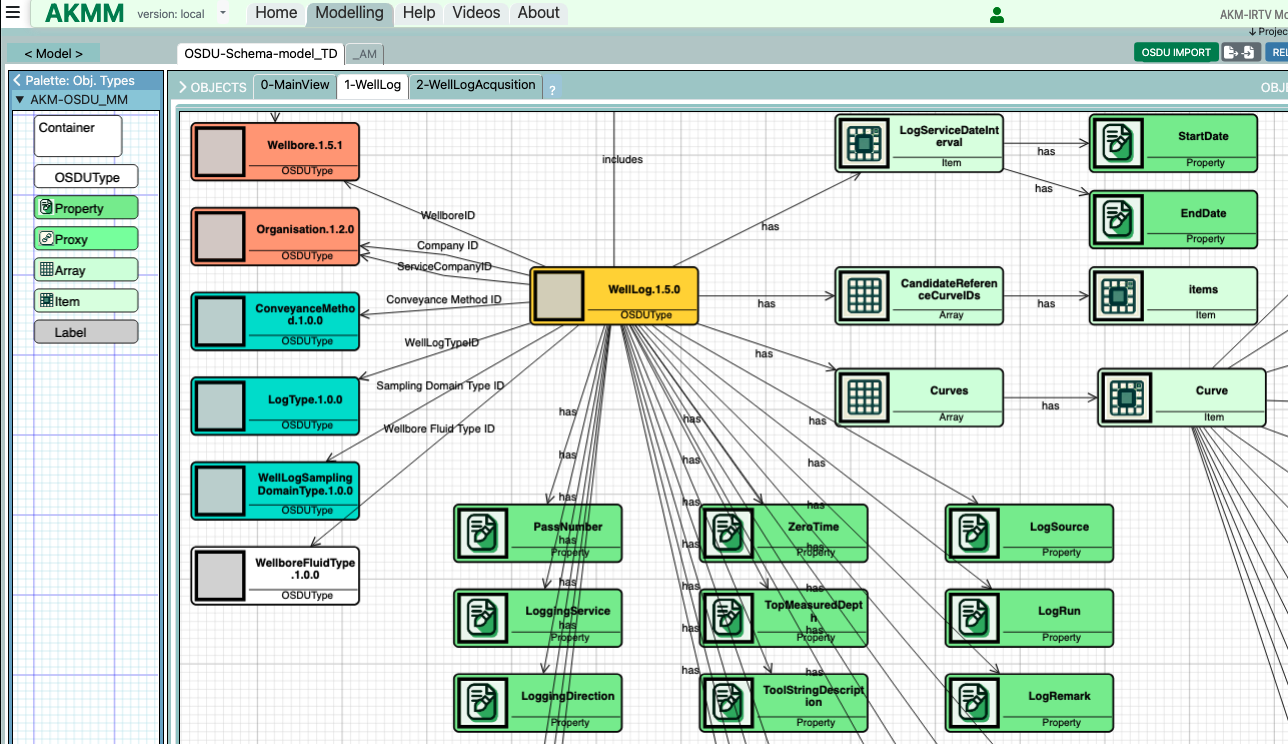
First we make a new WellLog modelview
Make sure you are on the “OSDU-Schema-model_TD” model-tab
This model has the “AKM-OSDU_MM” metamodel palette to the left.
- -Right-click the background and select “New Modelview”. Then Type inn a name: “1-WellLog” as Modelview name and click “OK”.
A new modelview tab will appear.
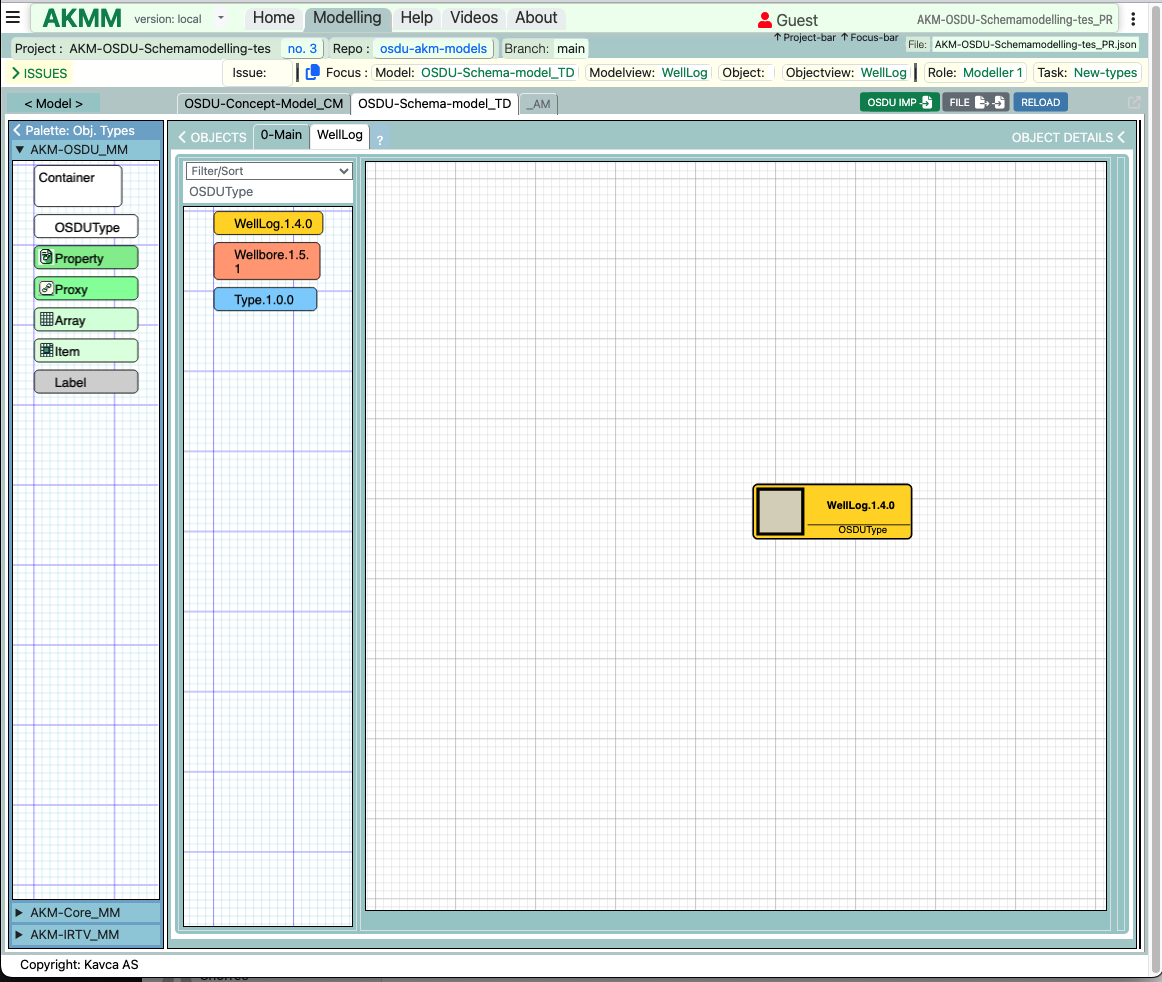
-Click on the new tab
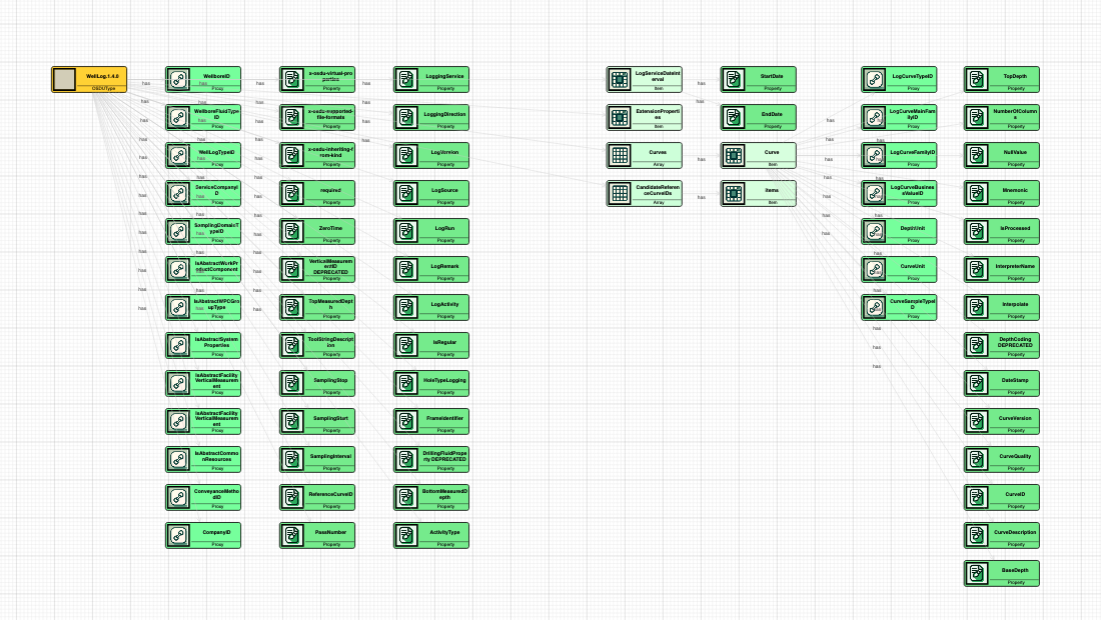
-Drag the WellLog Object from the OBJECTS Palette into the modelling area
- -Right-click the Object and select “Add Connected Objects” to view all connected objects like Properties and Proxies
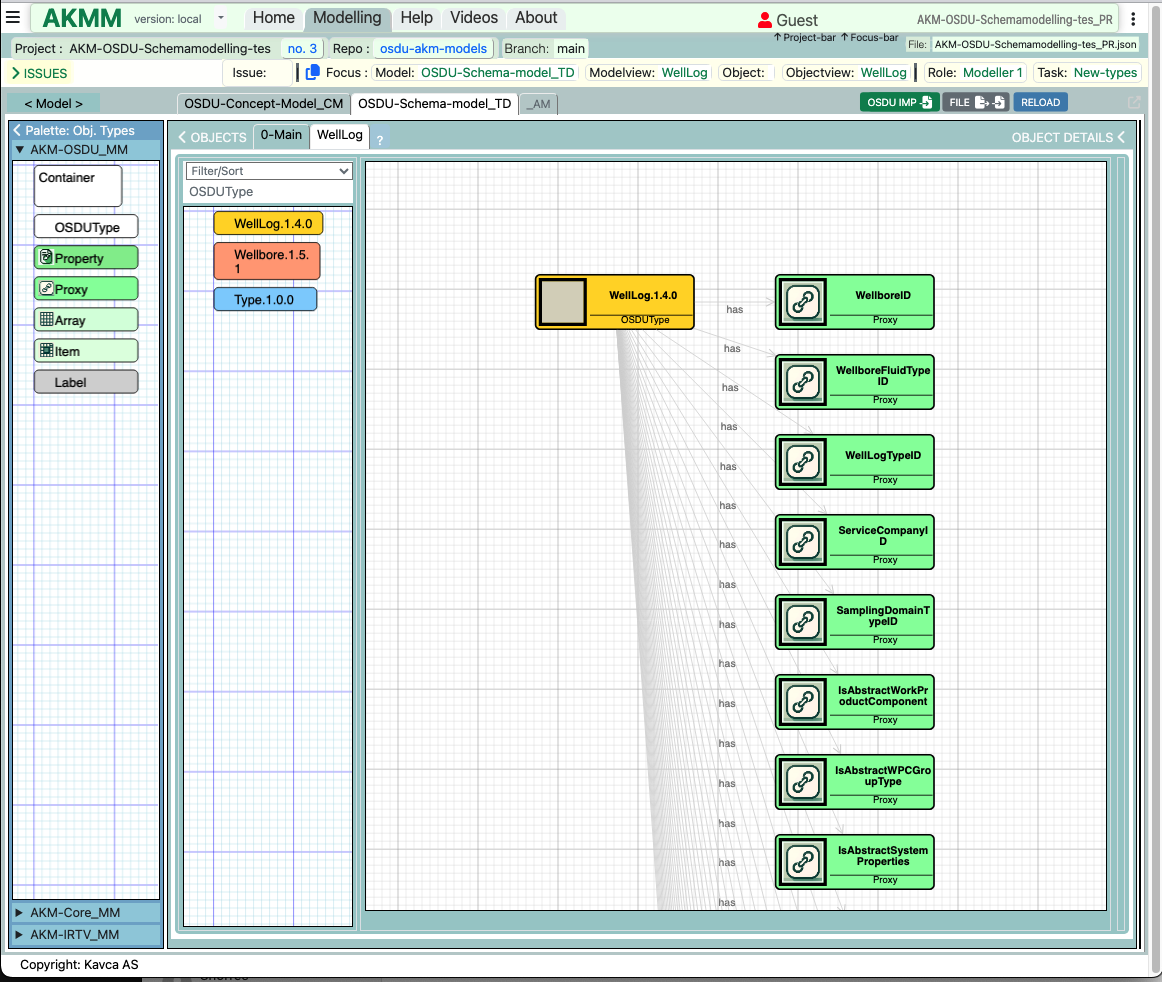
You can arrange the objects to fill a landscape modelling area.
Modelling the Main OSDUtypes
-Open the “0-Mainview” Modelview-Tab again
-Drag and drop the WellLog and Wellbore objects into the modelling area
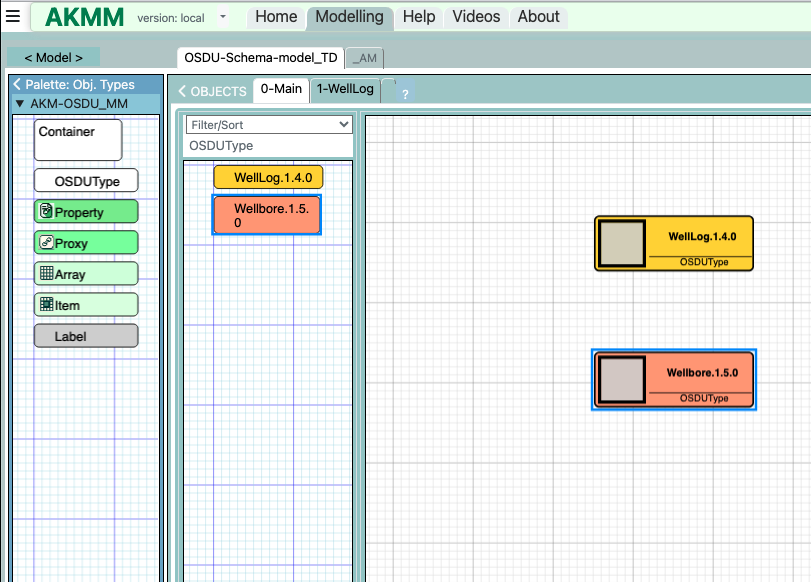
- -Rename the object to WellLog.1.5.0 which is the new version we are making.
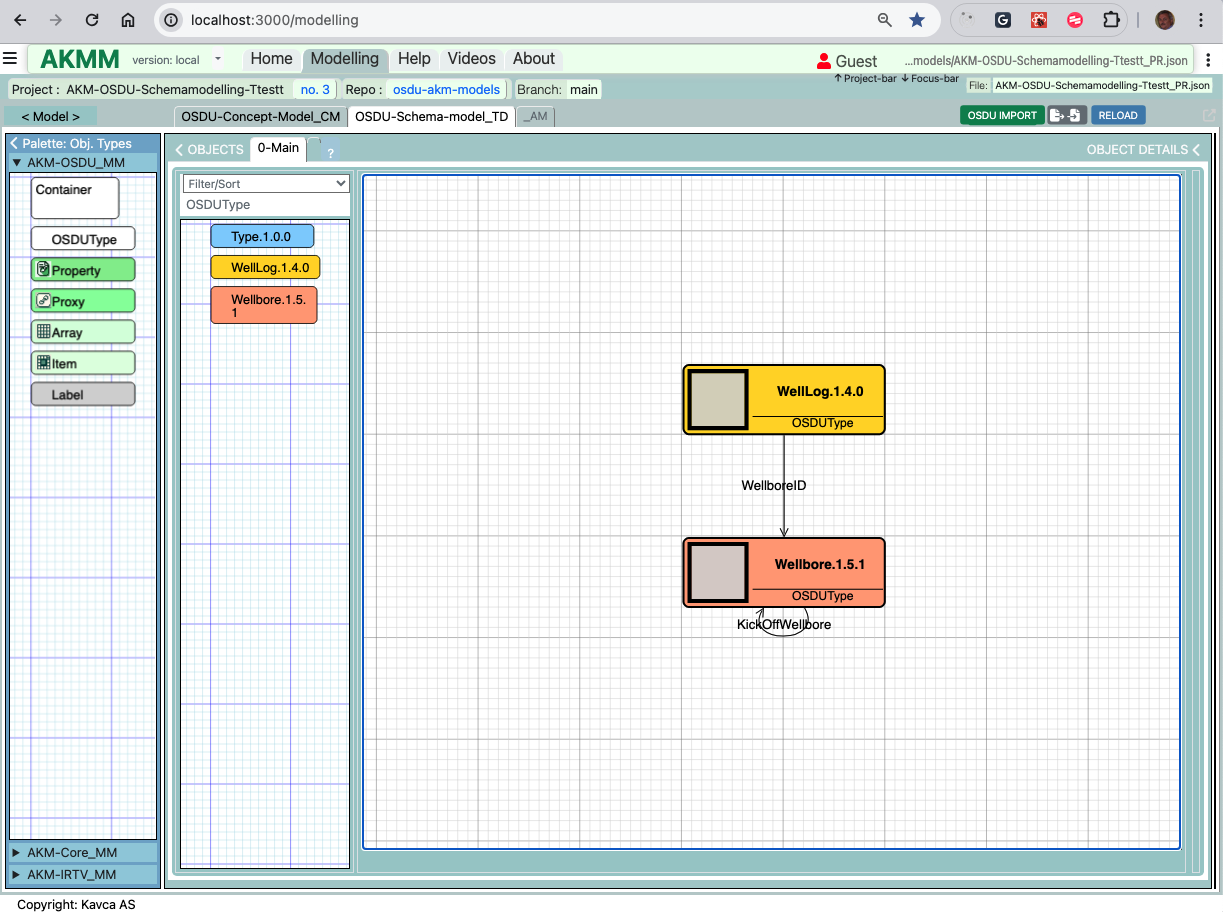
Generate relationships between WellLog and Wellbore
-Click the blue wide button in the middle of the dialog: “Convert temporary Proxy-objects to Relationships” to generate the relationship
-Click “Reload”
-Right-Click the background and select “Add missing Relationship Views” to show the relationship
Add the new types to the model
Drag and drop the “Type.1.0.0” object from the Object-Palette into the Modelling area
We will use this object as a template for our new types.
Right-click the object and select “Copy” and then Right-click the background and select “Paste”
(NB! Not “Paste view” as we want a copy of the object, not a view-copy)
Right-click the new object and select “Edit Object”
Change all the places you find the Type.1.0.0 text and replace it with our new name “WellLogAcquisition”. (name, osduId and §id)
-Change the groupType attribute to “master-data”.
-Change the color by select the tab "Visualisation" and change fillcolor to "lightsalmon".
Repeat for the AbstractLogAcquisitionRunPass
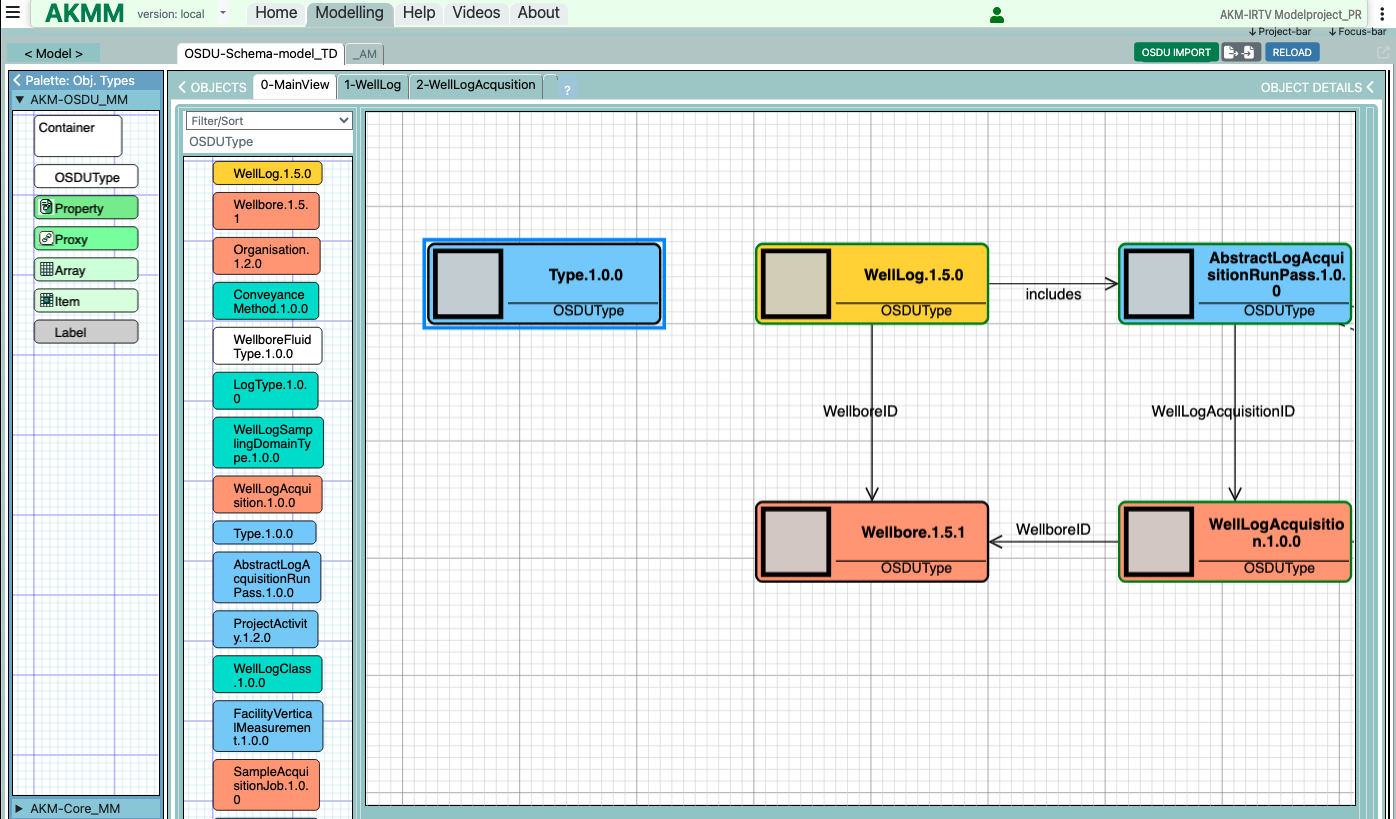
Set groupType to “abstract”. Connect the new Object to the imported WellLog and Wellbore Objects.
Move the cursor to the edge of the WellLog object (til you see the curved arrow), then Left-Click and drag over to the AbstractLogAcquisitionRunPass object and release the Left-Click to create a new Relationship. Select “Includes” relationshipType”.
Repeat to connect AbstractLogAcquisitionRunPass to WellLogAcquisition
Use the relationship type “refersTo”. Change the name of the relationship to “WellLogAcquisitionID”
Repeat from WellLogAcquisition to Wellbore and give the name “WellboreID”
- -Add “LogRuns”, “RunIdentifier”, “LogPasses” and “PassIdentifier” with relationships the same way
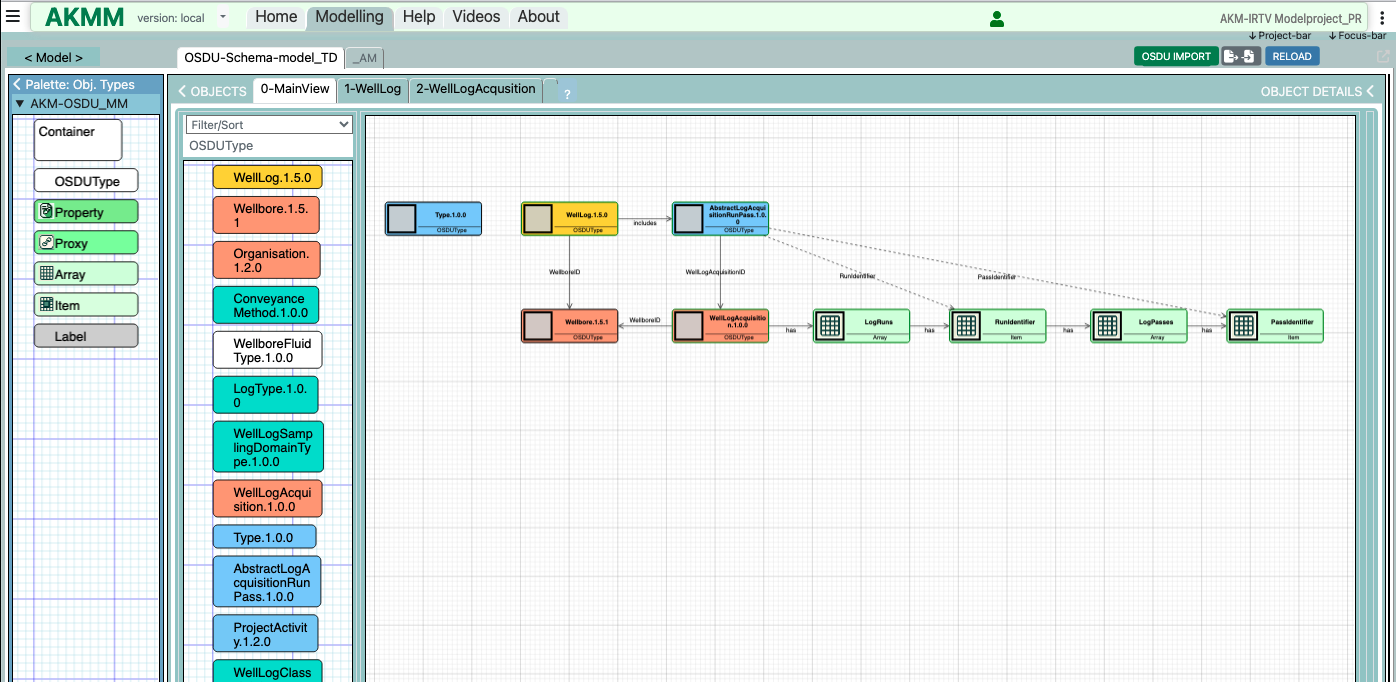
Update WellLog modelview with the new Abstract types
-Click to open the WellLog Modelview.
-Drag in and arrange the connected Abstract types like this:
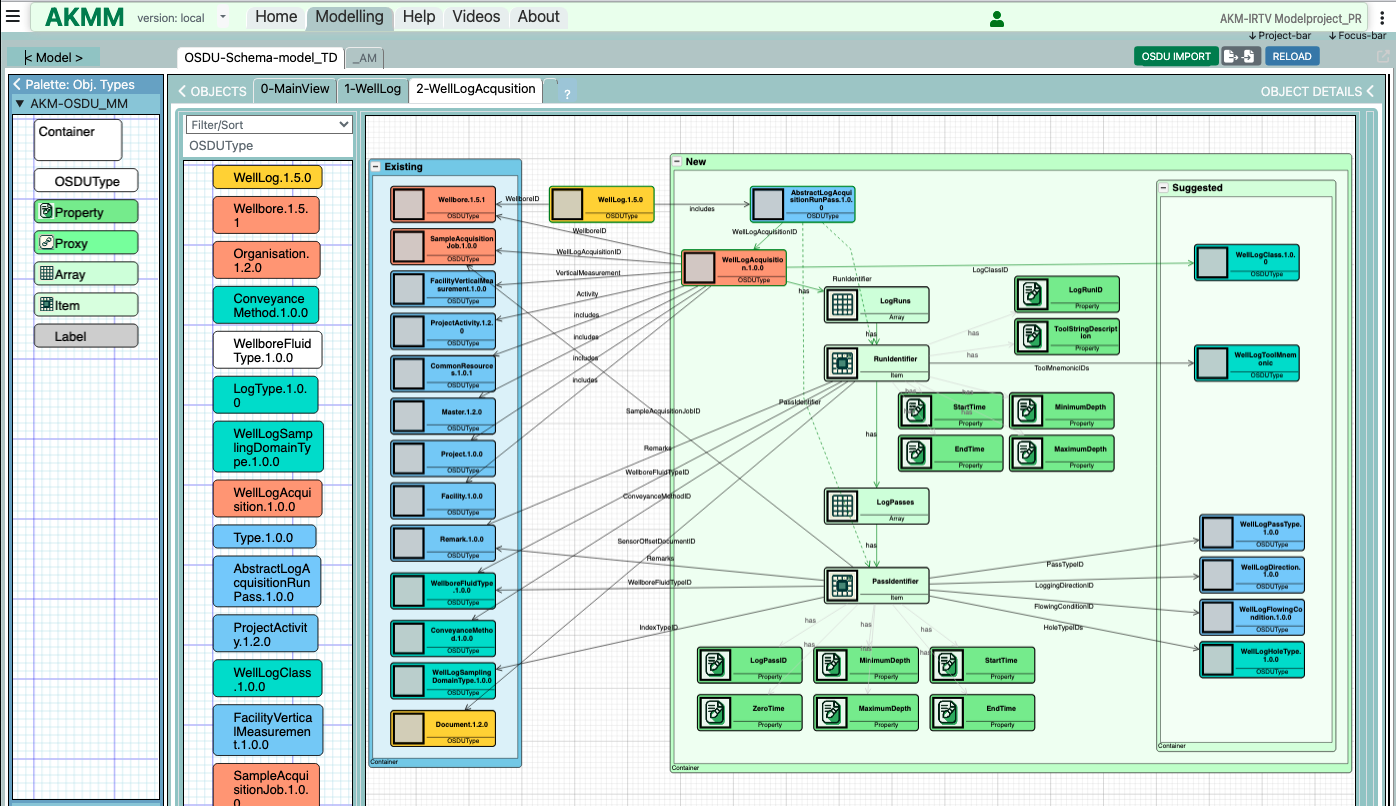
Modelling details of the new types
Make a new Modelview and name it i.e. “2-WellLogAcquisition. (The prefix number is to set the sequence of the modelviews.)
- -Drag in a container into the new modelview and copy objects from the 0-MainView and “Paste View” into the container
(NB! Use “Past View” not “Paste” as we don’t want a duplicate of the object (the instance), but just make another view of the same object.)
Arrange the objects in containers and add properties
All related existing objects, like “abstract”, “reference-data”, “master-data” and “work-product-component”
You can put them in a separate container and name it i.e. “Existing.”
Finally, you can add suggested new objects, and put them in a separate container, within the New container